Note: This was originally posted as a joke. However, I did not realize how close I actually was to figuring out how to replace the window regulator. This year (2019) my driver’s side window regulator went out, again, but I was able to purchase a new replacement for only $65 and replaced it myself. Checkout this video by someone else, on YouTube, for a great, step-by-step instruction on how to do this.
When I left work this afternoon I approached my car and found this:

Considering that an automotive windshield is typically rather transparent, as is most glass, it may be helpful for me to point out that the driver side window is down in the above photo.
Upon seeing this was I was so confused that, for a moment, I was actually stupid, which is generally uncharacteristic. Stunned, I entered the car and just sat there trying to remember if I had rolled down the window on my lunch break and simply forgot to roll it back up.
I even entertained the idea that perhaps my wife had dropped by while I was working, left a nice note, and then left the window down as a joke.
There was no note.
Nothing had been stolen.
She doesn’t usually steal things anyway but nobody else had taken anything either.
Unable to determine why the window was down, I tried to roll it back up. I immediately realized that windows don’t roll up anymore and instead tried to raise the window using the button.
It didn’t work. Instead I heard a winding sound combined a with bit of a slight grinding sound mixed in.
Crap.
I immediately knew what this meant.
I would have to spend money on my car again.
Only a few months ago I had a similar problem with a rear window (and my wife’s car has had a similar problem with a slightly different cause).
It was after five in the afternoon so at this point I knew the automotive shop I typically use was closing. I was also aware that there would be no guarantee that they could place it in the garage overnight so I decided to head home and, worst case, cover it with plastic until I could take it in the next morning.
As it happens, I have done some work on our vehicles in the past, and I’ve even replaced a speaker in this same door. I figured it was worth a shot to make an attempt to see if I could repair the issue and save a considerable amount of money on labor costs.
Required Tools
A mid-sized flat-tip screwdriver will work for the removal of the door panel.

Except for one bolt, which requires a socket wrench. I forgot to take a photo of the socket wrench, though that’s partly because I forgot about the bolt until I was taking the panel off.
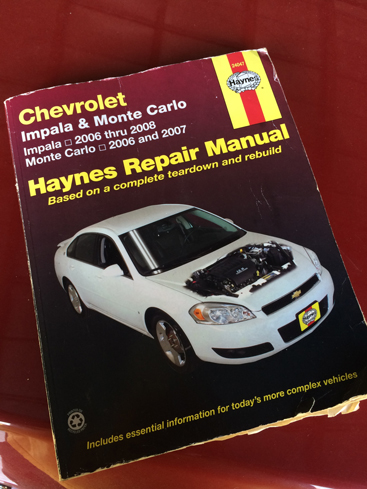
A Haynes Repair Manual can also be very useful, especially if you use it. I never opened it during this project but it’s good to have one on hand just in case.
Of course, when planning to be outside in warm weather I recommend wearing comfortable clothing, especially when working on a vehicle. I opted for shorts and sneakers. As a result, this called for a pair of ankle socks, which look slightly less silly than wearing longer white socks with sneakers.

I’m typically not thrilled about working on our vehicles so I opted for socks that remind me of “The Happiest Place On Earth”®.
I also selected a slightly offensive, tacky shirt that I purchased in New Orleans:

Remember, comfort is important.
And, of course, I also grabbed a beverage in order to stay hydrated. Sadly, I was so focused on this project that I didn’t actually crack it open until I was finished. I know, I know, that’s a foul.

Exploratory Surgery
Before you begin taking the panel off it’s a good idea to clean any garbage and loose items out of the pockets and caches.
I found two ketchup packets in my door under some receipts and soda straw wrappers.
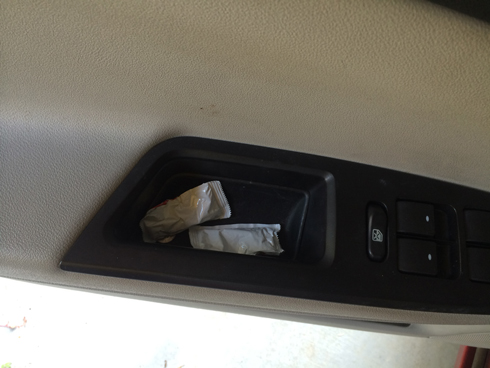
I don’t know how they got there or how they managed to go unnoticed.
The next step is to remove some screws before trying to remove the panel itself. Because this is a car the screws are not obvious.
Two are hidden underneath a rubber thing in the door that is there to catch every crumb and spec of dirt possible:

There’s also one hidden behind a piece of plastic, directly behind the door handle. The piece of plastic can be popped up with the screwdriver.

The only bolt you’ll need to remove with a socket wrench is hidden beneath the red reflector. It might look like a light but it’s not, it’s just a reflector.

There’s also a piece of plastic near the front, upper portion of the door panel that needs to be removed. Fortunately, I had previously busted one of the clips when I replaced a speaker so it was much easier to remove this time.

It’s also a good idea to disconnect and remove the door and window controls. Don’t shock yourself. I recommend disconnecting the battery first. I didn’t do this but I recommend doing it.
I actually reconnected the window controls so I could see the hardware failure in action. This was actually comical and it’s a pity that I wasn’t recording video of it. When I had it reconnected I then pressed the button to raise the window to see where the problem was. While I was watching the action on the inside I saw a metal wheel spin for a moment and then fall down into the bottom of the door.
Clink.

The Fix
Next, get a piece of wood and add a notch wide enough to rest the bottom of the window glass on. It’s smarter to measure it first, but I didn’t.

Then slide the window back up into position and cram the piece of wood into position so it will reliably hold the glass in the raised position.
The window lift still provided some resistance on its own but it’s clear that without this piece of wood it would just slide back (or more likely slam back) down. The next photo shows how this might look once completed:

The piece of wood is actually resting on a small metal ridge and will temporarily hold the window in place.
The next step is critical and I highly recommend that you do not skip this last step:
Take it to a mechanic.


Leave a comment