Using USB-Powered Fans (AC Infinity MULTIFAN S5) to Cool Entertainment Devices (Comcast X1 DVR)

Standard

This post contains Amazon Associate links. If you purchase something through them I may get a small commission, which helps cover the hosting costs for this blog.

Our X1 DVR simply can’t handle any heat buildup. This is probably largely due to the fact that it lacks any fans and several comments on the Internet seem to indicate that the device is underpowered and thus works harder to handle high-quality audio and video (and as a result it generates more heat). I’m undecided on whether or not the box needs to be replaced. The features are fine and when it isn’t having issues it works very well.

Lately I’ve started to experience the same symptoms of the box overheating even though it’s still outside of the entertainment cabinet and the air conditioner is usually on. This may have something to do with using a different TV, which is directly above a small part of the DVR’s case and perhaps restricting airflow in that area.

Last weekend I attempted to use a very inexpensive USB fan to cool the box. It was very basic; little more than a USB plug and a fan motor. It did actually work but it was on a flexible arm, which generated a lot of vibration and thus a lot of noise. Even though it only cost about $5 it simply wasn’t going to work. I also suspect the fan wasn’t intended for continuous use as I noticed the motor was warm when I removed. I dropped it into a box of unused devices and decided to look for something specifically made for this purpose.

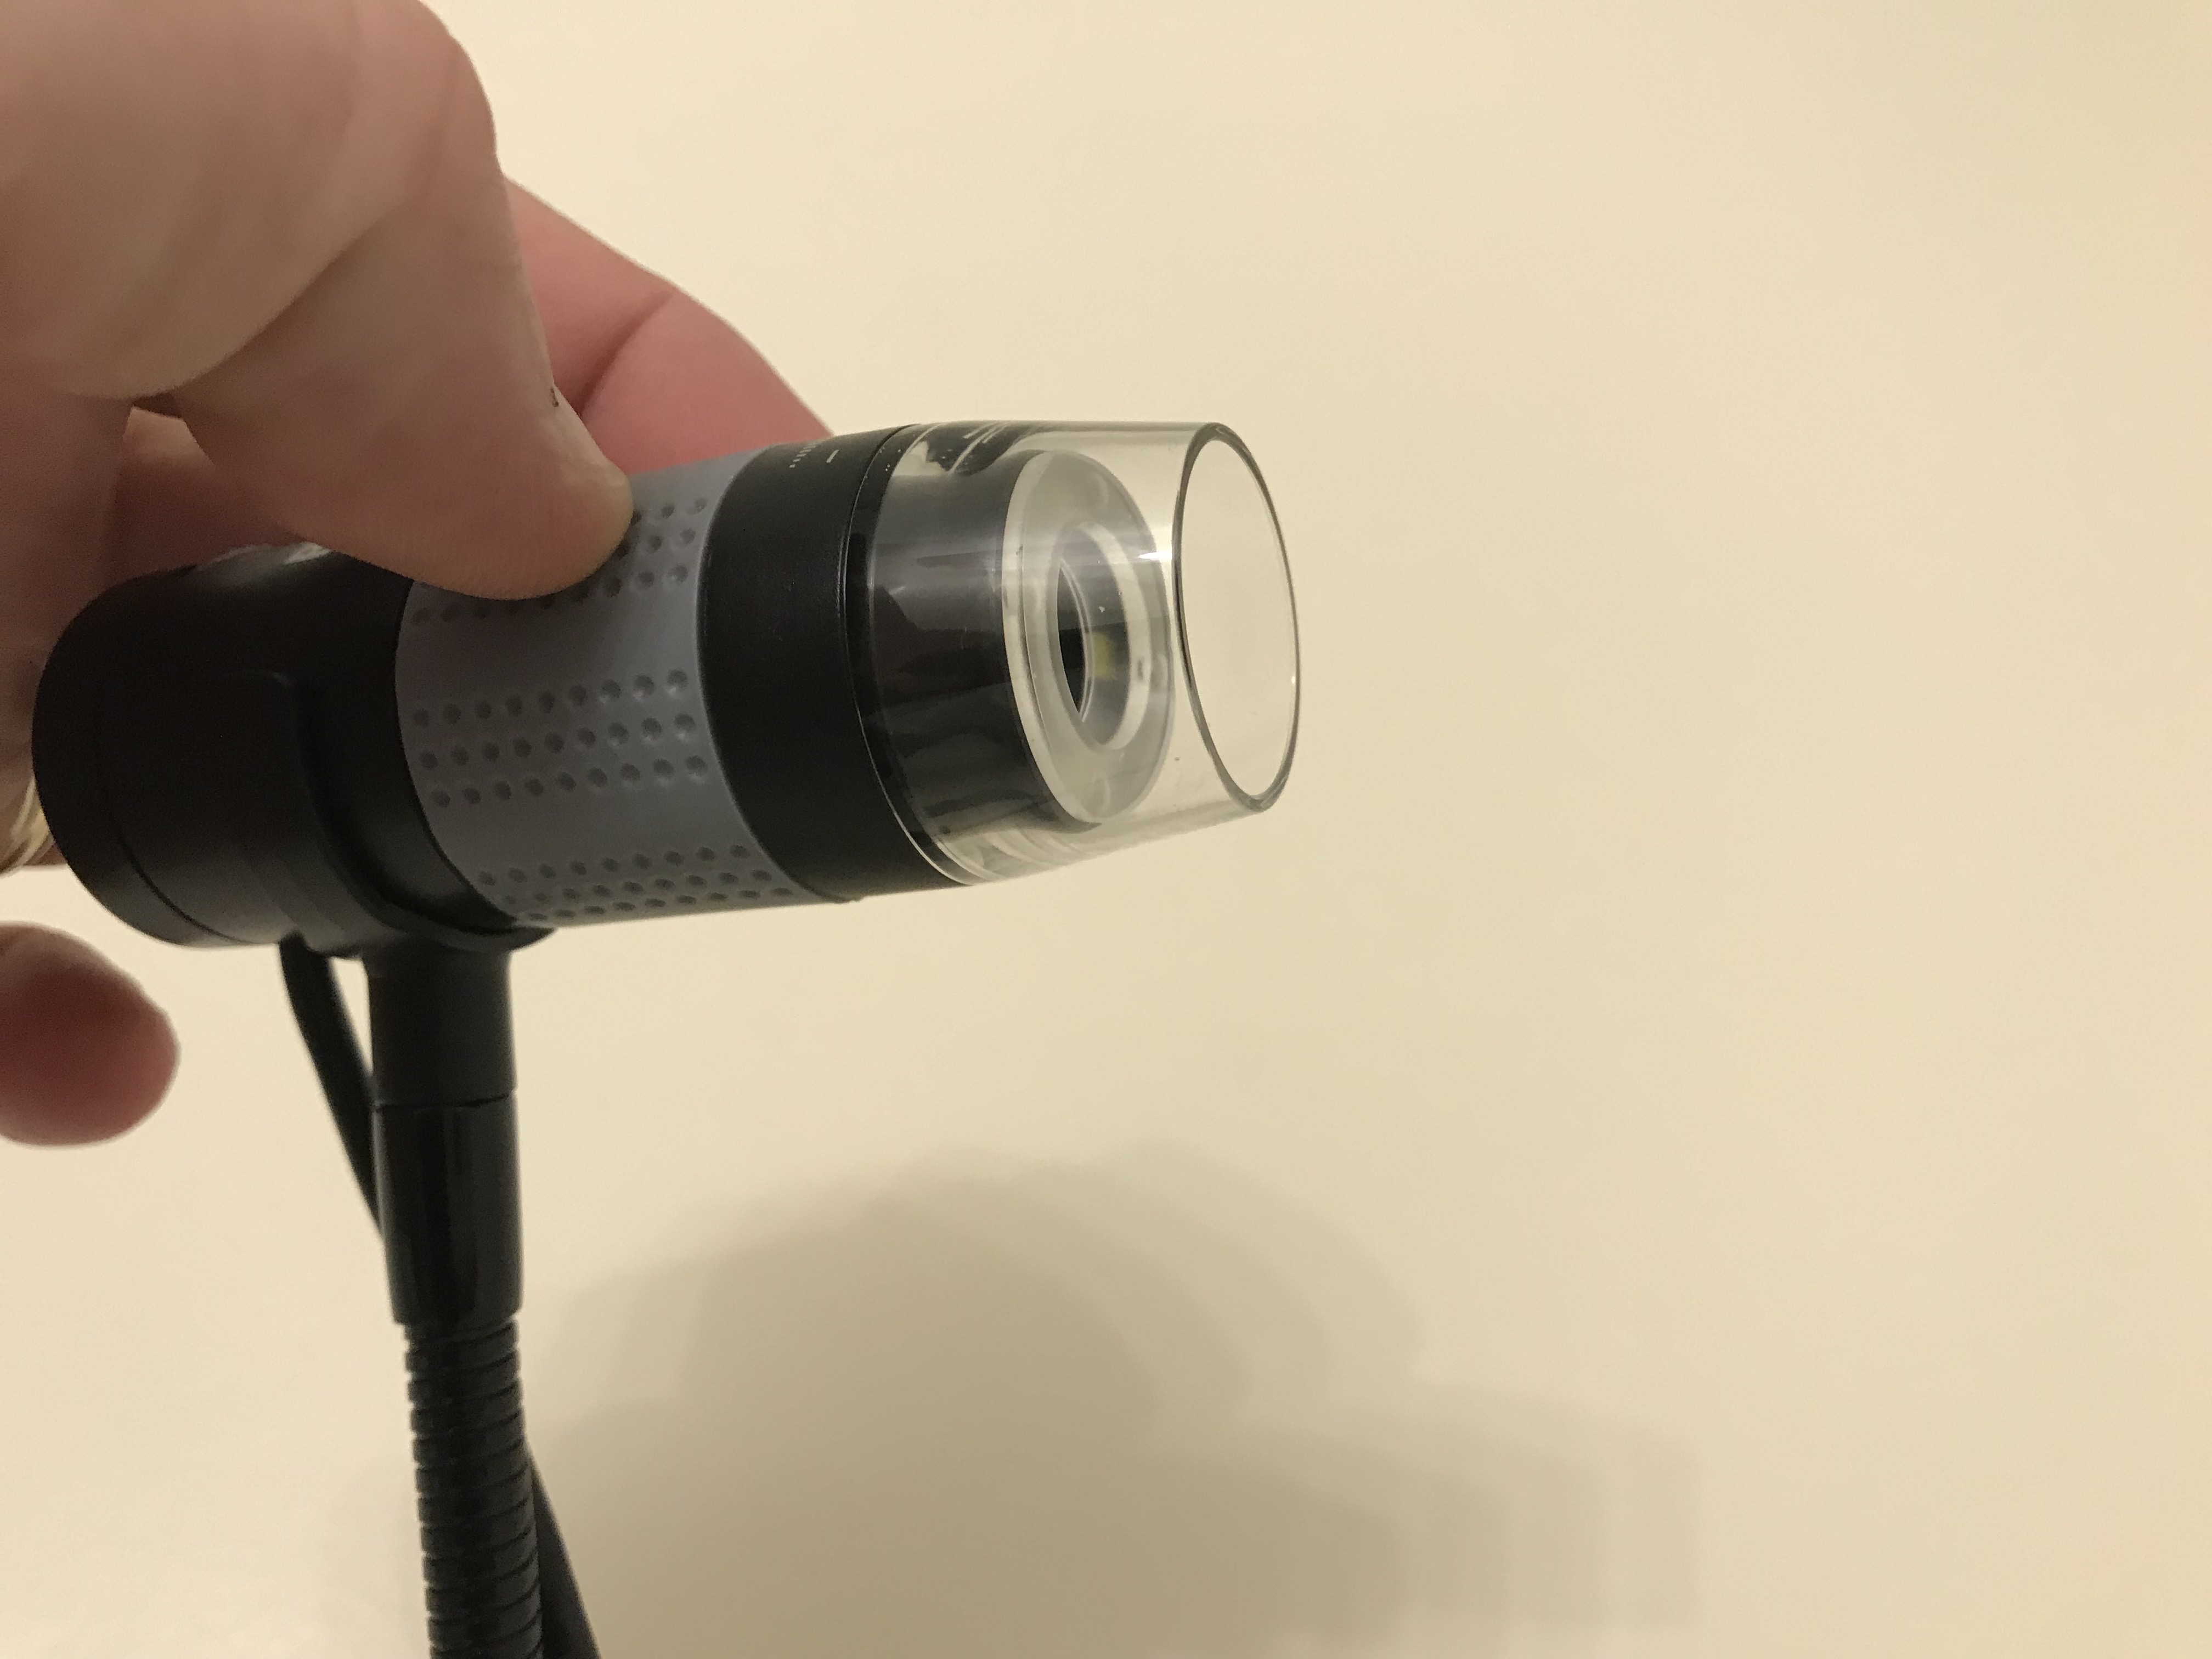
That’s when I found the AC Infinity MULTIFAN S5 on Amazon.com, which appeared to be a much better device for cooling the DVR (and indeed, it is). It features two fans that work from a single USB connection. In addition, more fans can be chained together though I don’t have a need for this capability. They truly are very quiet. The fans have a single switch that can be used to turn them off or to a low, middle and high speed. The highest speed isn’t very loud and the set is much, much quieter than the first fan that I had tried.

At $16 it looks like a good deal and even if I replace the DVR with something better, down the road, I can still reuse the fans with other devices. So far I’m extremely pleased with this purchase.

Updated 2018/08/08: These fans have given me the ability to place the Comcast DVR inside a the entertainment center. One fan is sitting directly on the cabinet vents, behind the shelf where the DVR is located, and the other is sitting directly on the DVR itself. So far, the DVR appears to be staying cool. I may order another set for my Xbox One as it generates a lot of heat when it is powered on.

A Good USB Microscope for Education and Fun (Plugable USB 2.0 Digital Microscope)

Standard

This post contains Amazon Associate links. If you purchase something through them I may get a small commission, which helps cover the hosting costs for this blog.

IMG_2520.JPG

Even though our son isn’t yet three years old I wanted to go ahead and introduce him to some cool science. I had the idea that a USB microscope might be a fun way. We could look at various things up close, including insects. After reviewing several devices I decided the Plugable USB 2.0 Digital Microscope with Flexible Arm Observation Stand for Windows, Mac, Linux (2MP, 250x Magnification) would be a good choice. With a birthday coming up soon I chose to add it to my wishlist rather than outright buy it though at only $35 it’s a great price. Sure enough, someone bought it as a gift.

The only thing I can’t offer a comment on at this stage is how well it holds up as I’ve only had it for a week. I’m impressed by the simplicity of how it works. The device easily connected to my Mac and instead of requiring the installation of driver software it connected as a standard USB webcam. At this point the only software I’ve used to view and capture images is Apple’s built-in Photobooth app.

The microscope has a built-in LED light with a plastic guard surrounding the camera. To view something up-close one simply holds the guard against whatever is being inspected. The focus is adjusted by twisting the middle, rubber part of the camera assembly.

It’s USB only though it wouldn’t take much effort to connect an HDMI cable to my laptop and send the video to a TV. I’ve only used it on macOS though its supported on multiple operating systems.

Here are some sample images:

Photo on 4-7-18 at 1.35 AM.jpg

Close-up of the threads in the comforter on our bed, including some dyed strands.


Photo on 4-7-18 at 1.36 AM #2.jpg

This is the smooth, aluminum shell of my MacBook Air.


Photo on 4-7-18 at 1.36 AM #3.jpg

Threads in a pair of my pajamas.


Photo on 4-7-18 at 1.36 AM.jpg

High thread-count bedsheet, which normally looks dark blue.


Photo on 4-7-18 at 1.37 AM.jpg

A closeup of the bottom side of one of my feet.

Easy Accessory Power Switch for a 2008 Chevrolet Impala

Standard

This post contains Amazon Associate links. If you purchase something through them I may get a small commission, which helps cover the hosting costs for this blog.

I used a dashcam, phone charger and bluetooth adapter in the car for a while but I grew tired of having to manually unplug those devices when not in use or when I turned the car off. Unfortunately, in my 2008 Chevrolet Impala the vehicle would continue to provide power to any plugged in accessories even when the engine was off. Most of these devices are low power but even a dashcam, given enough time, could eventually drain the vehicle batter, especially if the car wasn’t being used for several days.

Re-wiring the electrical system and messing with fuses is beyond my experience so I decided to see if I could find an automotive power strip that would have a built-in power switch and sure enough I was able to find the perfect device.

The EUGIZMO Cigarette Lighter Splitter only costs about $16, offers three DC outlets, four USB power ports, a large power switch for the unit and also a very good visual indicator to show whether or not it is on.

I chose to mount this upside-down, just below the vehicle’s built-in DC power ports. This placement moves most of the power adapters and cables out of the way; whenever I turn the car on or off it’s very easy to just reach down and hit the large power button.

Car-Power-Strip

At first affixing the unit beneath the dash was a bit of the problem as the first type of velcro that I had used simply wasn’t holding and it would often come loose during the day. Eventually I ended up using some VELCRO Exterme Outdoor Strips and it hasn’t come loose since.

Updated 04/18/2018: The splitter and power button continue to work perfectly. In addition, the VELCRO has held; it hasn’t come loose yet. 

Learning Experience: Attempting to Transfer a Windows 7 Install to Boot Camp (PC to Mac)

Standard

Source System
Lenovo Notebook
SSD Hard Drive
Windows 7

Target System
MacBook Pro (Late 2013, 13.3″ with Retina Display)
SSD Hard Drive
Boot Camp

For the more literal folks, I apologize. I realize that a Mac is actually a PC but for the sake of simplicity I added it to the title so everyone would understand what I was trying to do.

I recently needed to transfer a Windows 7 install from a Lenovo notebook over to a MacBook Pro Bootcamp partition. I need to make it clear that this project was not a success. However, I have learned a few things that others will find useful. In addition, had I followed some advice available in a blog post it’s possible that it would have worked. After all, I did succeed in migrating the partition over and it did attempt to boot…

This particular transfer was a bit more challenging due to the fact that both systems use SSD drives. As a result, I couldn’t simply pull a drive and execute more direct partition clones.

Should you be considering such a move then a good place to begin is a blog post by twocanoes titled Migrating a Real PC to Boot Camp with Winclone 4. Basically, this is the advice I did not follow. Now, my reason for not following it wasn’t irrational. I was very concerned that I’d run Sysprep before cloning, only to then discover that it simply wouldn’t work. Perhaps if I hadn’t been trying to do this quickly I could have attempted this while also having a good fallback clone of the partition made BEFORE running Sysprep or any other changes (and it did not turn out quickly – I spent more time trying to make this work than I did simply starting with a fresh Windows 7 Bootcamp install).

So, once again, I’m confident that I could have succeeded in this endeavor had I followed the advice from twocanoes. However, even though I wasted a lot of time I did learn a few valuable things along the way.

Continue reading

5-Port USB Wall Charger (EasyAcc)

Standard

USB-Charger-EasyAcc

Having accumulated several devices that charge via USB, sometimes I don’t have enough USB block plugs on hand (and other times I’m just tired of digging around to find the adapters) to charge everything up at once. Last week I purchased a couple of 5-port USB wall chargers (EasyAcc) from Amazon for less than $20 each, which have helped make this minor inconvenience less of an issue.

This particular model isn’t something I plan to move around frequently. Instead I have located them in key spots where they’ll remain most of the time. One is at my office and the other is in our guest room.

So far they seem to work well and they’re about as simple as expected (and needed). There is one thing of note that interested purchasers may need to be aware of. The USB ports do not all provide the same level of output, though it’s clearly marked on the device how much power each port provides and it’s unlikely to be an issue for most people.

  • USB1 5V/2.1A (iPad)
  • USB2 5V/1.3A (Samsung Tab)
  • USB3 5V/2.1A (iPad)
  • USB4 5V/1A (iPhone)
  • USB5 5V/1A (Android)

Using a Philips VOIP 080 Skyp VOIP Travel Phone (VOIP0801B/37) with a Mac (Mountain Lion)

Standard

Philips-Skype-Phone

The Short Version: The Philips VOIP0801B/37 Skype Phone is not fully compatible with Skype and Mountain Lion. The microphone and speaker work fine but the keypad does not.

I’ve had a Skype account for some time though I’ve never used it very often. In general, it serves as little more than a backup calling system. I’ve been thinking about using the service more often at home so I decided to try to find an inexpensive device that would serve as a dedicated Skype phone.

Earlier this week I received a Philips VOIP 080 Skype VOIP Travel Phone (VOIP0801B/37) that I purchased from Amazon for about $30. Unfortunately, I should have read several of the reviews more closely when trying to determine whether or not this would actually work with my Mac (10.8 Mountain Lion).

It partially works. The Mac recognizes the device connected via USB and the Skype software can be configured to use the microphone and speaker. However, the keypad appears to be useless. Dialing, etc has to be done from the Mac.

Before I purchased this I was well aware that Macs were not officially supported but I had the impression it would actually work. Perhaps I’ll stumble upon some trick to get the keypad working with the Mac but for now I’m stuck with a device that doesn’t work as I had hoped because I didn’t research it adequately.

Updated 07/06/2014: In the end I was never able to use it as I had intended. It’s now in our collection of yard sale items.

Plugable USB 2.0 to Gigabit Ethernet Adapter

Standard

USB-Ethernet-USB2-E1000

Several months ago I lost some network ports on different devices due to a power surge from a nearby lightning strike. Unfortunately, one of the devices that took a hit was the ASUS system I’m using for managing home automation. After the surge I configured the system to use wifi but it was struggling to keep up with network traffic (the system does more than just manage my home automation setup).

After I while I decided to purchase a Plugable USB 2.0 to Gigabit Ethernet Adapter. It’s worked great ever since and as far as I can tell I haven’t had any new problems with the system (and bandwidth has clearly improved over the wifi connection). The device retails from Amazon for about $25.

Powermat 2X (Powermat Wireless Charging Kit)

Standard

Large-Powermat-01

One of the items I received for Christmas was another Powermat. The first kit I purchased can only charge my iPhone but this kit can charge two devices at the same time. It also includes a wireless charging adapter that can be used with nearly any USB device with the included adapter tips.

The kit is great and so far seems to work without any issues. Placement of the iPhone is a little different. The other charging kit is practically form-fitted so the case fits in easily. On the larger charging mat it takes slightly more work to place the iPhone properly but it doesn’t take long to get used to figuring out the proper alignment to charge.

It does suffer from the same issues the other Powermat has – annoyingly bright LEDs (to indicate charging) and the sounds that it makes when the mat begins to charge a device. Those issues aside it’s excellent. I like the convenience of not having to plug and unplug every time I want to charge – this should help prolong the life of the connectors for when I do need to charge with a cable.

Overall, I’m really enjoying this gift. One of the reasons I wanted it was so I could also charge my first-generation iPod nano, which it does. It’s also capable of charging my 3DS with the extended battery.

Large-Powermat-03

Default Settings for a Netgear 54 Mbps Wireless Print Server w/4-port Switch (WGPS606)

Standard

Someone gave my father-in-law an old Netgear wireless print server. It includes two USB ports (for printers) and four ethernet ports. The device can connect to an existing wireless network, so it’s essentially a wireless bridge device. He wanted to use it to extend Internet access to an out-building on his property.

I configured the device to work with his network. In the process, I had to find the default settings so I could connect to the device and configure it. Netgear no longer offers support for this device and I wasn’t able to download the manual from Netgear’s Website. I had to use third-party sources. I figured I’d go ahead and post the default settings needed to connect to this device.

Netgear 54 Mbps Wireless Print Server w/4-port Switch (WGPS606)

Device IP: 192.168.0.102
Username: admin
Password: password